How to Infill Gel Nails at Home the Right Way
|
|
Time to read 6 min
So, your gel mani has grown out, and it's time for a much-needed nail refresh. But did you know, that rather than removing all the hard work you put into creating your mani, you can actually just infill your gel nails?
Infilling is exactly what it sounds like – you're simply filling in the nail growth with new gel. This saves you time removing the entire gel polish, not to mention saving the product.
It's really important that you follow the infilling process correctly to make sure that your gel mani not only looks clean but will last you another good 3 weeks before having to be infilled again, or removed.
Can You Infill Gel Nails?
If you've used Mylee's Builder Gel, Magic Extender Gel or Fix 'N' Flash Tips as your base, then yes – you can infill your gel nails.
You can't infill gel nail polish on its own, however. That needs to be removed completely before you can apply a new layer of polish. So if your base is an extension gel, then the process for infilling your nails is pretty simple.
With that in mind, we've put together our step-by-step on how to achieve a professional gel nails infill at home. Let's get started…

Step 1: File Down Your Gel Polish
The first step is to file down your existing gel polish using the 100-grit side of the Mylee Half Moon Nail Files. The key here is to remove a good chunk of the gel – around 90%.
You need to remove the shiny top layer of the polish and most of the base gel you've used for your mani to give you a nice, neat surface to work with.
Use a back-and-forth motion with the nail file, applying enough pressure to remove the gel, but not too harsh as to damage your natural nail underneath or your surrounding skin.
Step 2: Prep Your Cuticles
Once you're satisfied that most of your gel has been filed down, you can move on to cuticle care and prep. After a few weeks of wearing gel nails, your cuticles will more than likely have grown back, which can lead to your nails looking messy and causing the polish to lift and peel.
Use a cuticle pusher, like our Mylee Metal Cuticle Pusher, to gently push back the skin, being firm but not too harsh.
You should also trim any dead white skin* to neaten up your nails using the Mylee Cuticle Nippers.
*Please note: only trim the dead skin from your nails; never live skin. This can leave your skin open to bacteria and cause infections.

Step 3: Buff & Dehydrate Your Nail Surface
After prepping your cuticles, you'll need to buff the nails being infilled, just as you would before your regular gel polish application.
Buffing is a really important step in any gel polish application process because it gives the gel better adhesion to the nail plate. Without this rough surface to grip, your mani won't last nearly as long.
When buffing, use the Mylee Buffer Sanding Block, using back-and-forth motions to create that rough texture. It's very important not to over-buff your natural nails; otherwise, you could end up damaging or thinning your nail plate – just enough to create a rough surface is enough.
Once you've finished buffing, use a Lint-Free Nail Wipe to remove any dust and wipe down the nail plate with Mylee Prep & Wipe to remove any dust, dirt and oils before applying your gel.
Before applying your gel, you’ll need to dehydrate your nail surface. The Mylee Nail Prep Dehydrator is a super quick and easy way to do this. Simply glide the dehydrator onto your nails and leave to air dry.

Step 4: Apply Your Chosen Gel Extension Polish
At this stage, your nails should be ready for infilling. If you've used a Builder Gel base, then you should infill with Builder Gel, and if you've used a Magic Extender Gel Base, then you should use a Magic Extender Gel to infill.
Fix 'N' Flash Tips can be infilled using either of the two, but the process for all remains the same.
Apply a thin layer of your Builder Gel or Magic Extender Gel, starting at the apex of the nail and pushing the brush towards your cuticle. Then, float the gel over the whole nail plate and polish, creating a smooth finish.
If this is your first time infilling gel nails, then it may take some practice. Remember to be gentle with your brushstrokes, and take your time smoothing out the gel for a perfect finish.
Apply a little more of the gel to the centre of your nail to build up the apex and add structure to your mani. This will support the length of your extension.
Top tip: turn your nail upside down for a few seconds before putting it in the lamp, allowing gravity to help give you more height in your apex.
Once you're happy with your gel nail infill, cure underneath a Mylee LED Lamp for 60 seconds, or a UV lamp for 120 seconds.
You can sculpt your nails using a Mylee Half Moon Nail File to your desired shape, making sure to sweep away any dust.

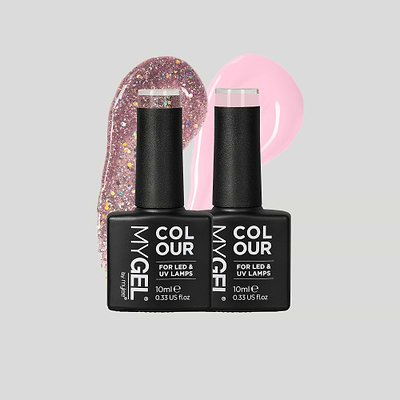
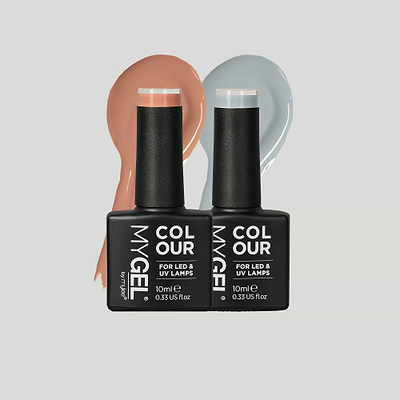
Step 5: Apply Your Mylee Gel Polish Colours
After curing your nails, you can get started on the fun part! Paint your nails using your chosen Mylee Gel Polishes and create whatever nail looks you desire.
Remember to cure in between each coat of gel polish, and always finish with a Top Coat to seal in your mani.
How Often Should You Infill Gel Nails?
It'll be different for everyone since we all have varying nail growth times, but typically around 3 weeks is when most people tend to infill their gels.
You'll notice when your gels need infilling when your natural nail is exposed at your cuticle end, and the gel nail has moved upwards.
Lifting is also another sign that you might need to infill your nails (or that you didn't correctly prep your nails before applying your polish the first time).

Infill Your Gel Nails at Home Like a Pro with Mylee
Infilling your gels at home make take a little practice, but you'll be doing it like a pro in no time! Make sure you follow our steps to a T and grab all the essential Mylee nail tools before you get started.
Our team of gel nail pros are always on hand via our socials if you have any questions, and our blog is full to the brim of nail tips and tricks, so be sure to head on over there.
FAQs
Can you infill gel polish?
Yes, and no. While you can't infill gel polish by itself, you can infill gel extension bases, like Builder Gel, Magix Extender Gel and Fix 'N' Flash Tips.
Do gel nails need to be infilled?
You'll know when your gel nails need to be infilled when the gels have moved forward, and your natural nail is exposed at the cuticle.
Should you constantly infill gel nails?
There's no reason why you can't repeatedly infill your gel nails, so long as you're doing it correctly! You might want to remove the entire nail polish if you want something completely different or if the extensions are damaged.
Can you change nail colour when getting infills?
Yes! You don't have to use the same gel polish colour as your original mani when infilling. Just be sure to remove the bulk of your polish when your filing down your nails so as not to leave behind any traces of coloured polish.

Ellie Simmons
Ellie is the Brand Manager at Mylee, where she immerses herself in all things gel nails.
Alongside being a skilled and certified nail technician, Ellie's expertise extends to gel manicures and nail extensions. Her heart and soul are devoted to all things nail-related, and she loves flaunting her own long, natural nails with captivating nail art.
Ellie's ultimate favourites are iridescent and sparkly designs!